REVEL
How to create a custom payment type
- Log in to your Revelup web portal (storename.revelup.com).
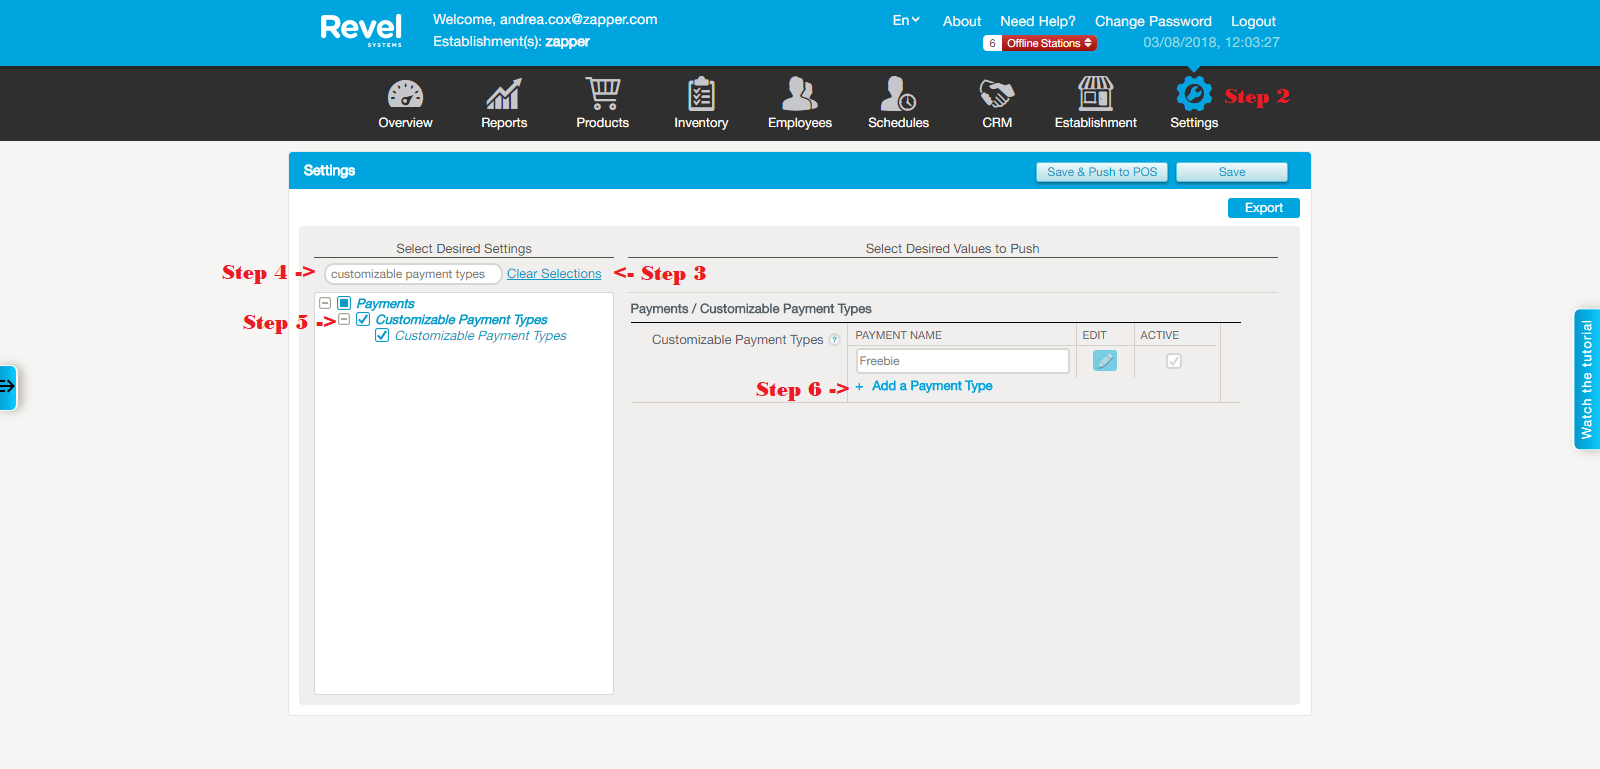
- Click Settings.
- Click Clear Selections in the box on the left side of the screen.
- In the “Search for Settings” box, type Customizable Payment Types.
- Click the checkbox next to “Customizable Payment Types.”
- On the right side of the window, click “Add a Payment Type.”
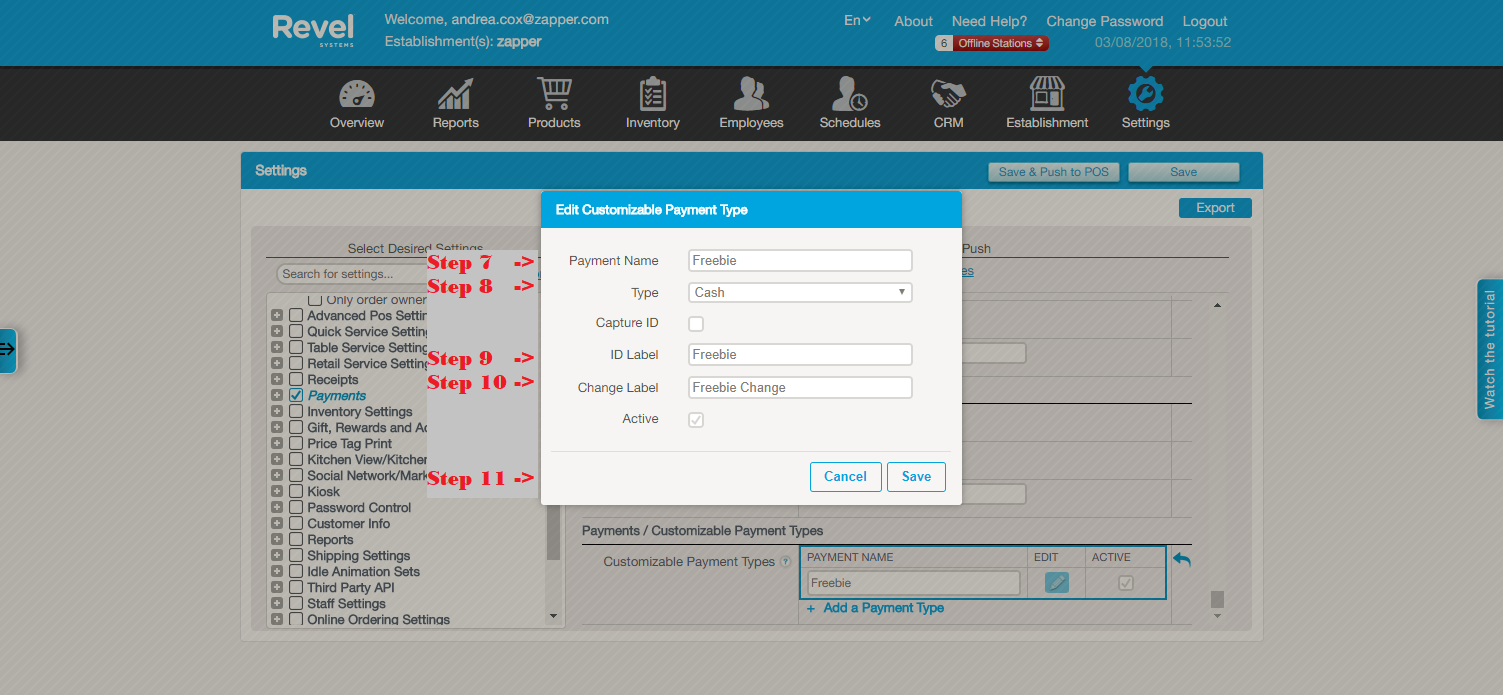
- Name your payment type “Shared Spirits”
- Select Cash for the Type.
- For the ID Label, type the name of your new payment type (Shared Spirits)
- For the Change label add the word “change” (Shared Spirits Change)
- Make sure the Active box is checked, then click Save.
- Click the Save button below the settings gear at the top of the page.
- Click Establishment.
- Click Stations in the column on the left side of the window.
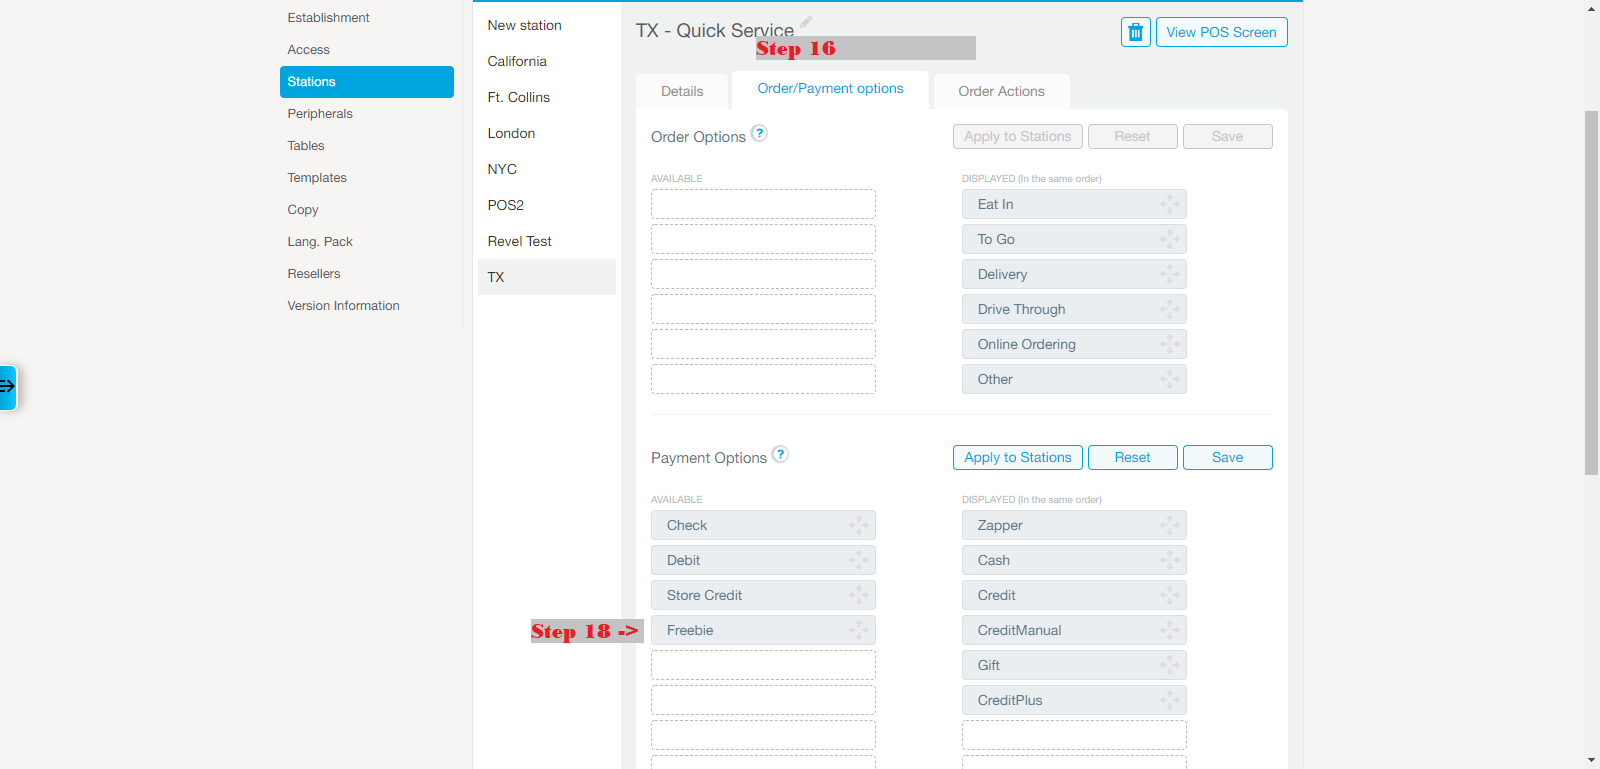
- Select any of your POS stations.
- Click the Order/Payments tab.
- Scroll down to Payment Options.
- Click and drag your new payment type from the left column, to the right. Place it wherever you would like your new payment type to show up. The first 6 payment types will show on the first page of the payment screen on your iPad POS.
- Click Apply to Stations and select all of the POS stations you would like to have this payment type available on.
- Click Apply. Click Apply.
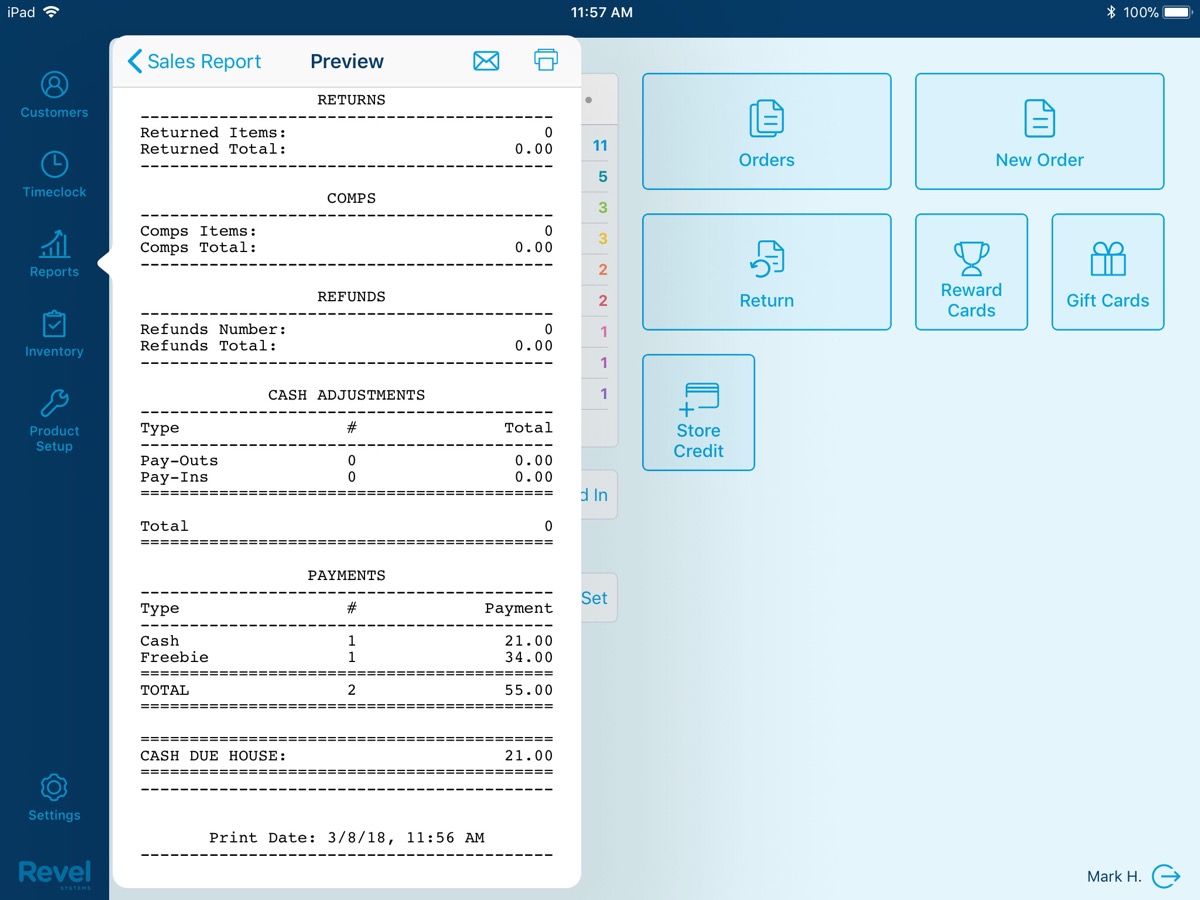
- Refresh your POS on the login screen.
Below are screenshots to walk you through the process.